In this article I will cover the following tasks:
- WiPy Hardware Setup
- WiPy Default Passwords
- Debugging
- WiFi & E-mail Setup
- Safe Boot
So let’s get started…
WiPy Hardware Setup
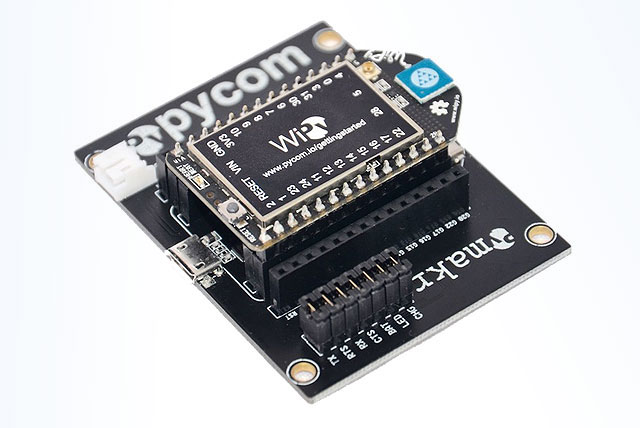
This one is easy. Set up the WiPy as shown below and plug the USB cable to your computer.
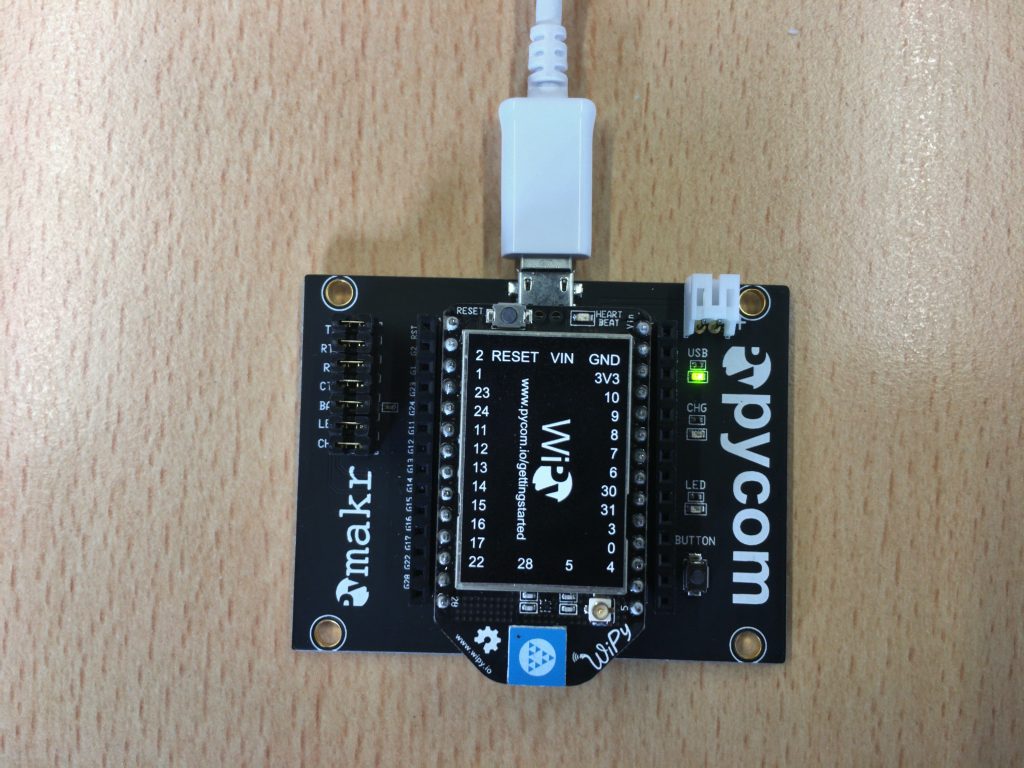
I am using a Mac, however most of this information also applies to Windows PCs.
You can buy the WiPy module and development board from Amazon:
WiPy Module @ AmazonWiPy Universal Expansion Board @ Amazon
WiPy Default Passwords
So the first thing we need to do is to connect to our WiPy – to do this you need to search for it in your WiFi settings. My WiPy was the last one in the list 🙂
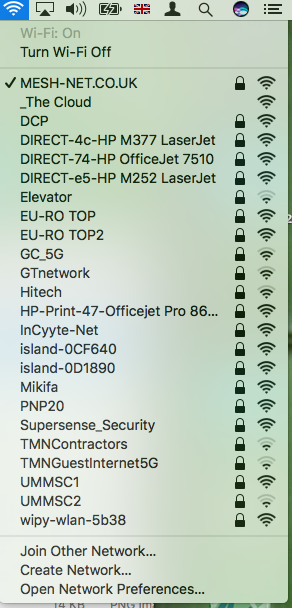
You will then be prompted for the WiFi password. This default password is:
www.wipy.io
Once connected, using FileZilla you can easily update the WiPy and make changes to test your code. The default IP address of the WiPy is:
192.168.1.1
This IP address is used in setting up the FTP connection to the the WiPy. Here is how my FileZilla setup looks:
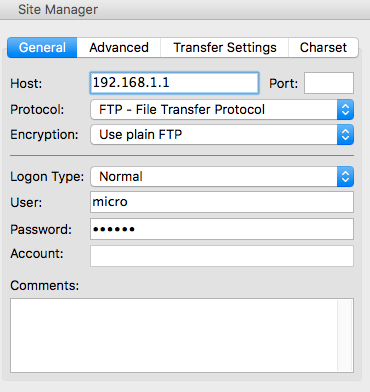
User: micro
Password: python
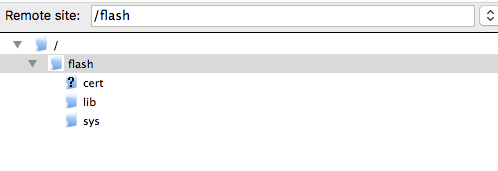
After clicking Connect, you should be able to see the WiPy filesystem shown in the remote site section of FileZilla:
Now let’s setup debugging.
WiPy Debugging
Open a terminal window and type the following command to find the serial port name for your WiPy:
ls /dev/tty*.*
Then simply enter the following command:
screen tty.<your device> 115200
In my case…

This will allow you to communicate with the WiPy via USB instead of WiFi and provides a terminal output of events as your program executes. Handy to see what your code is doing.
You will see a blank screen with a flashing cursor. This is expected as the output will be shown once the micro python code starts.
Time to code, MicroPython code… 🙂
WiFi & E-mail Setup
In a new terminal window clone the following wipy-starter project from github:
git clone https://github.com/gbhogal/wipy-starter.git
In your local wipy-starter folder update settings.py with your WiFi SSID and password:
![]()
Update main.py with your e-mail address and the credentials for your e-mail:

Using Filezilla, copy the contents from the wipy-starter lib to the lib folder on your WiPy. Copy your boot.py, main.py and settings.py to your WiPy flash directory.
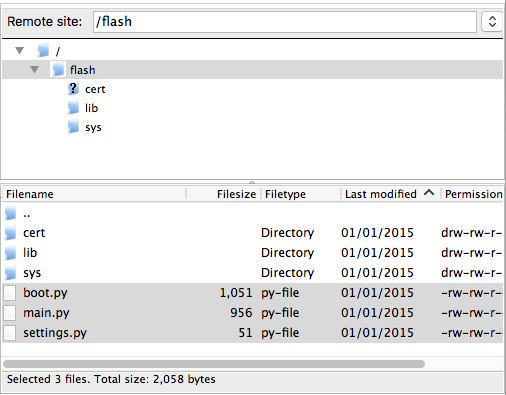
After the files have been transferred successfully, press the RESET button on the WiPy.
The WiPy will reboot and attempt to run the boot.py code first and then the main.py code. In the boot.py file I have the code to connect to the WiFi network. The main.py file contains MicroPython code to update the internal RTC using NTP from the internet and send you an e-mail.
You should see an output similar to the this in your debug terminal:
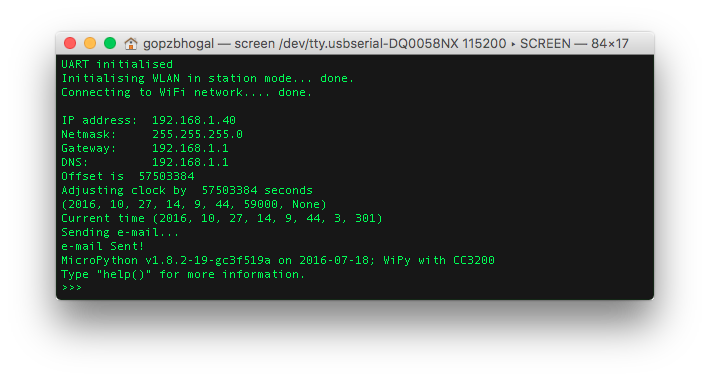
And of course you should get an e-mail with the time from the WiPy 🙂
You should note the IP address being displayed in the terminal of your WiPy as you will need to reconnect to this IP address in Filezilla to update the code files as you will no longer be connected directly to the WiPy.
If you have any problem in connecting to the WiPy, you can always safe boot it as follows:
Safe Boot
Safe booting bypasses your boot.py and main.py files. To do this you override the boot sequence by pulling GP28 up (connect it to the 3v3 output pin) during reset as follows:
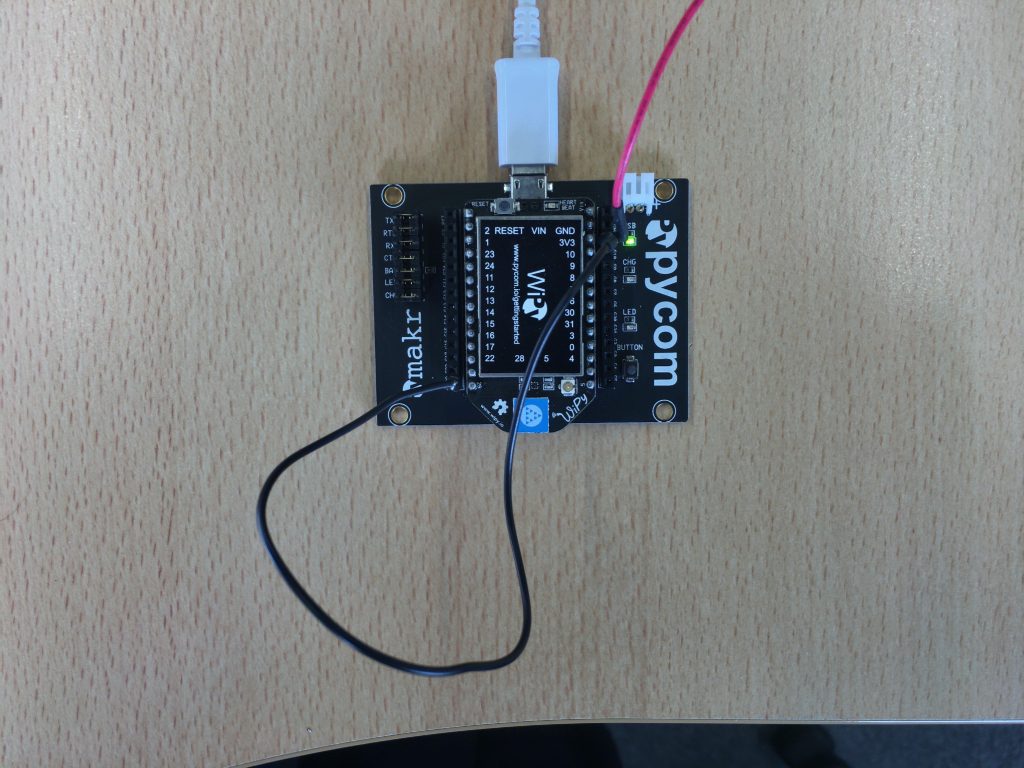
Press RESET and wait 7 seconds (until the LED blinks very quickly) and then remove the cable from the 3v3 line. You will then be able to connect to the WiPy from your WiFi settings as described above.
See Safe Boot Details for further information.
References
Thank you Daniel for the SMTP library.
Thank you Andrew for the NTP library.

Gurpal Bhogal
Technical Director
Recent Projects
COVID-19 and Air Quality
At this present unprecedented time, the main topic for many discussions is COVID-19 and how it has affected your business and working methods. Data sources have shown concentrations of Nitrogen Dioxide (NO2), a pollutant mainly emitted by road transport have...
Renewables Business Analytics
Business Analytics (BA) is probably the most common terminology used in business today. It generally refers to collecting data within the business to help visualize their performance and make data driven decisions on improvements. It is a cyclic process of...
BluMesh Performance
What is BluMesh?BluMesh® is Mesh-Net’s new proprietary Bluetooth 5 mesh networking protocol developed for Industrial IoT (IIoT) applications including Smart Buildings, Lighting, Metering, Wireless sensor networks, Renewable Energy, Data Centers, Remote Monitoring,...
LoRa Line Of Sight Range Test
A few weeks ago we attempted a Line of Sight (LoS) range test for our LoRa transmitters and receivers but we soon ran out of LoS range (see https://www.mesh-net.co.uk/lora-range-tests/). As it is difficult to find several kilometers of LoS in London, we headed to the...
LoRa Range Tests
Not quite Line of Sight Test (869 Mhz LoRa) What started off as a Line of Sight (LoS) range test for our LoRa transmitters, soon became not quite LoS as we ran out of room. So we decided to keep on going... Through bushes - LoRa signal getting through without a...
Official Bluetooth Mesh Network
Bluetooth technology now supports mesh networking, unleashing the incredible potential of many-to-many communications. With Bluetooth mesh, tens, hundreds, or even thousands of devices can now connect to automate homes and businesses, create wireless sensor networks...

